
Steps to Implement Cloudberry:
- Login into cloudberry
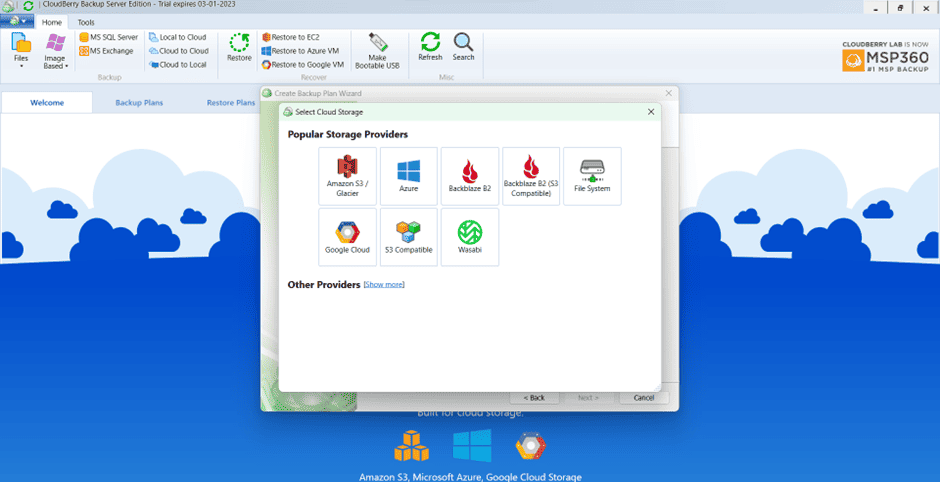
- Choose Local to cloud
- Next -> Add a new storage account
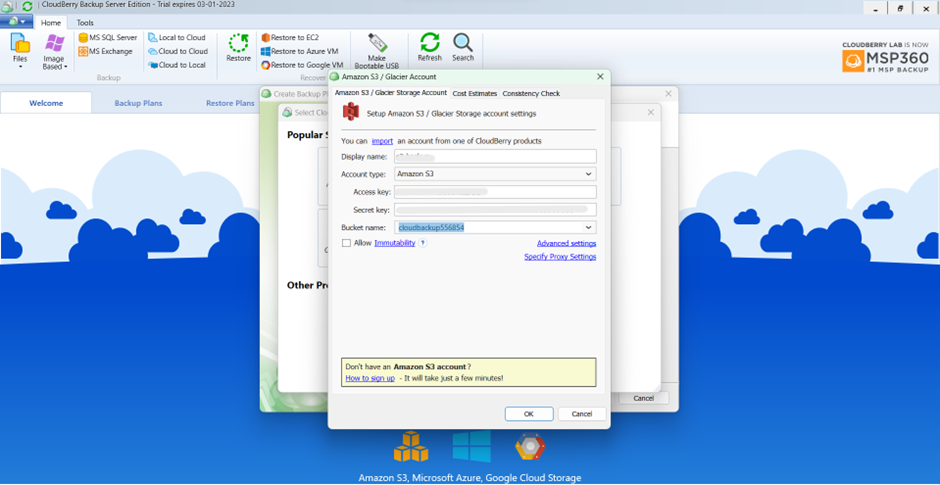
4. Write display name
5. Choose Account type
6. Write access key and secret key of IAM user and Bucket-name
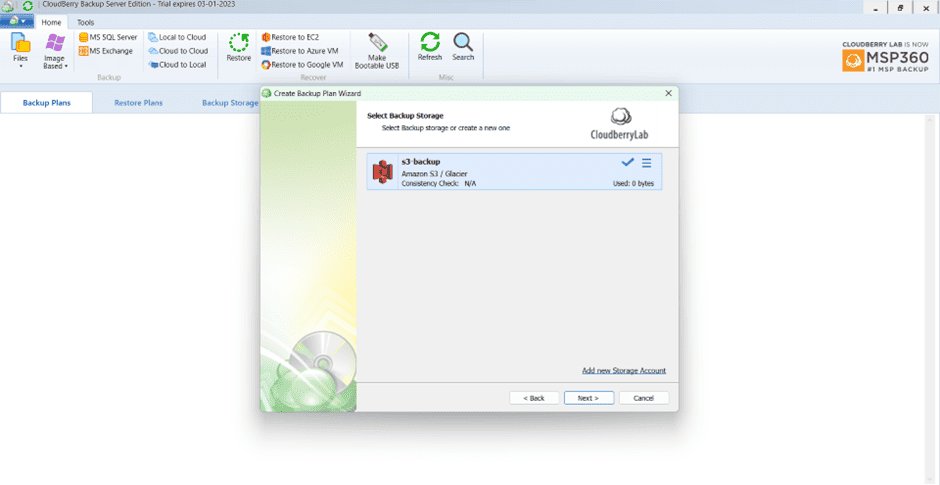
7. Go next here is your backup plan
8. Go next -> Plan name -> next ->
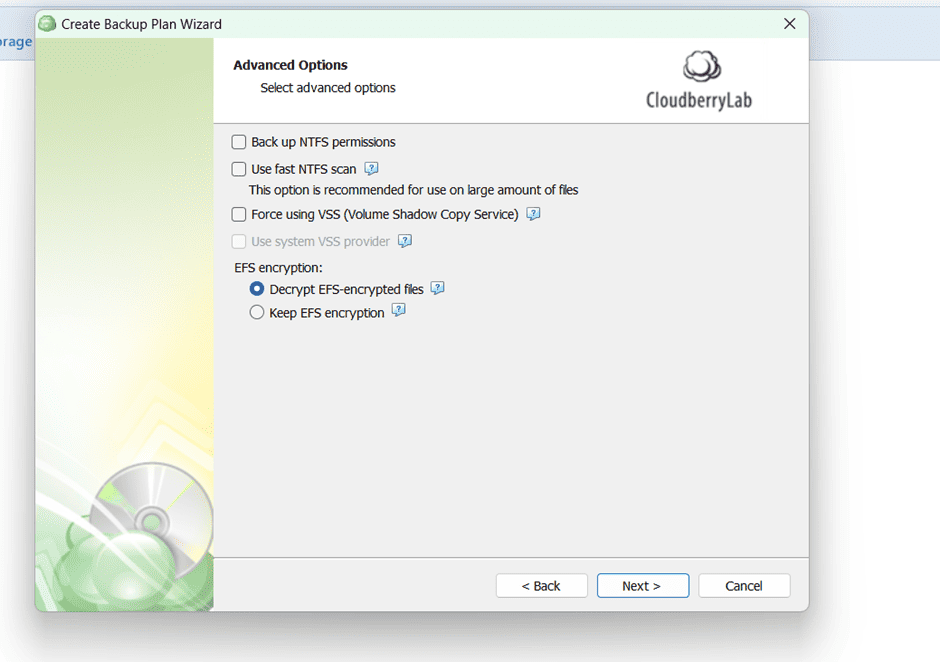
9. Enable decrypt EFS encryption
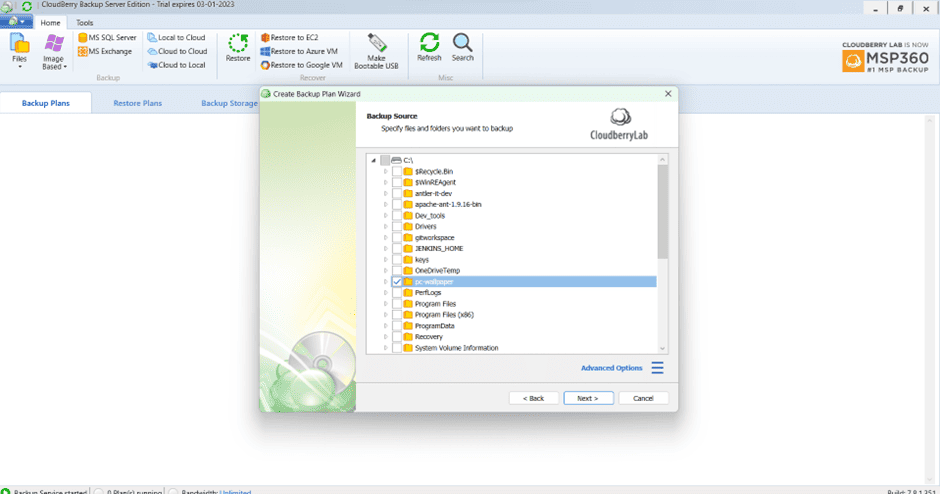
10. Go next -> select backup source
11. Go next
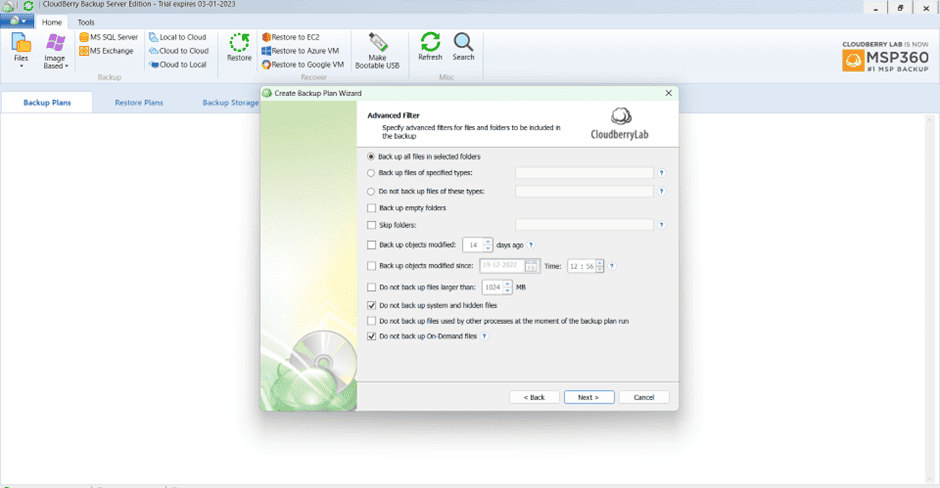
12. Enable backup all files in selected folder
13. Remain do as it is.
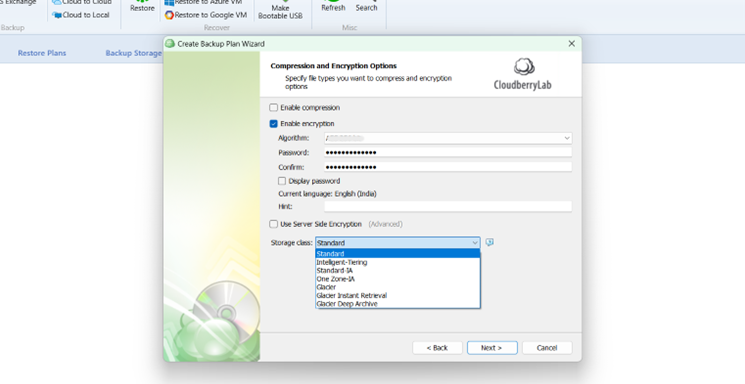
14. Next disable compression, enable encryption chose algorithm ASE 256 bit
15. Set Password
16. Disable server side encryption
17. Choose storage class
18. Go next enable full Consistency check -> next
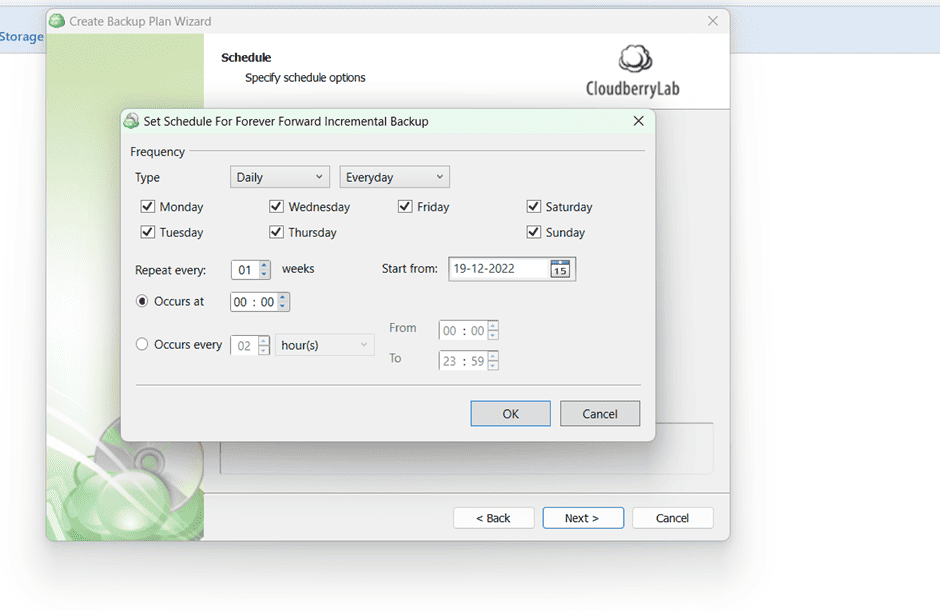
19. Create Schedule
- Select the No schedule option to run the backup plan manually
- Select the Forever Forward Incremental option to apply the Forever Forward Incremental (FFI) schedule
- Select the Recurring option to execute the backup plan on a periodic basis. Once you select this option, specify the schedule for incremental backups for this backup plan:
You can set your incremental plan like this
20. Next -> enable do not purge next ->

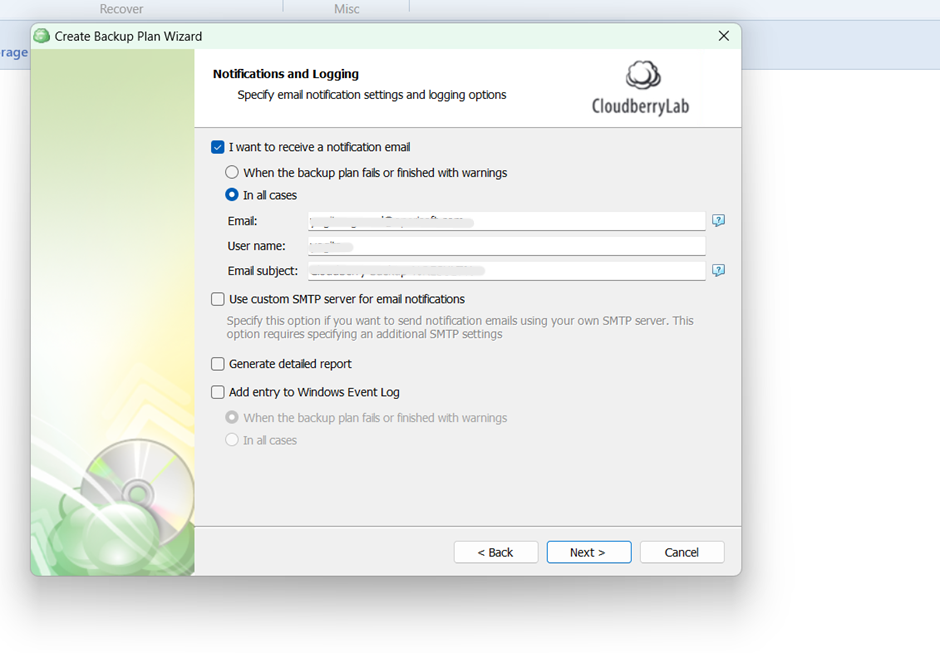
21. If you want to receive email after completion of backup just fill details email, username
22. Next -> summery next -> enable the checkbox run backup now -> finish
23. Run the backup plan.